

How to Draw An Owl. The owl is a bird often associated with wisdom and mystery. These largely nocturnal birds move silently through the night air, and their distinctive sounds are a common sound effect in scary movies.
Also, check our unicorn coloring page.
Due to their sense of mystery and the fact that they operate primarily in the dark of night, owls have been a favorite of bird lovers for many years. If you also love owls, you should learn to draw one yourself.
How to Draw An Owl
Step 1
For the first step in our how to draw an owl guide, we’ll use a pencil to draw some guide shapes for the rest of the drawing.
For this step, it would be better to have a lighter-colored pen, as we will erase these lines later.
In this first step, some tools make it much easier. First of all, having a ruler will be very helpful.
If you have a tool like a compass to draw circles, you’ll have a lot more fun too! If you don’t have these tools, you can also go slow and draw them freehand, and you’ll still get a similar effect.
First, draw a straight line across the page. Then you can draw two ovals that overlap, as seen in the reference image.
Finally, draw three horizontal lines and use the image as a guide for what the spacing should look like.
Step 2
Now that you’ve drawn the pencil guides, you can start outlining the head of the owl design.
Using the top oval, you drew earlier, carefully trace over the outline and create two triangular extensions for the feathers on your owl’s head, as you can see in the picture.
I recommend not deleting the pin guides, as you can still use them for the next few steps.
Step 3
For the thirst step of this tutorial on drawing an owl, add the wing on the left. Use the bottom oval as a reference for the owl’s body.
Just use some curved lines on the outer edge of the second oval to shape the first wing as it appears in the picture.
Step 4
Your owl needs two wings, so for this step, you can repeat the process from step 3 in reverse for the other side.
Step 5
With the wings added, you can complete the body of your owl design.
For this step, you can draw three short, curved lines under the owl, the others starting from the tips of the wings. You fill in the spaces between in the next step!
Step 6
For the sixth step of this tutorial on drawing an owl, you can add some feet to your owl.
To do this, draw two rectangles in the gaps previously left and then divide each rectangle into 3.
This will reveal the divisions in the owl’s legs and make it appear as if it is perched on a branch.
Step 7
At this point, you can start erasing the pencil guides from step one. Now let’s add a face to your owl.
In the reference image, we’ve shown one way to draw a face for your owl, but you can also create your variation by changing a few details!
You could add more or less curved lines and change the eyes and mouth for some fun facial expressions!
Once your face is drawn, use some curved lines to add a tail under the owl.
Step 8
Your owl drawing is now almost complete! It just needs a few more small details to complete it.
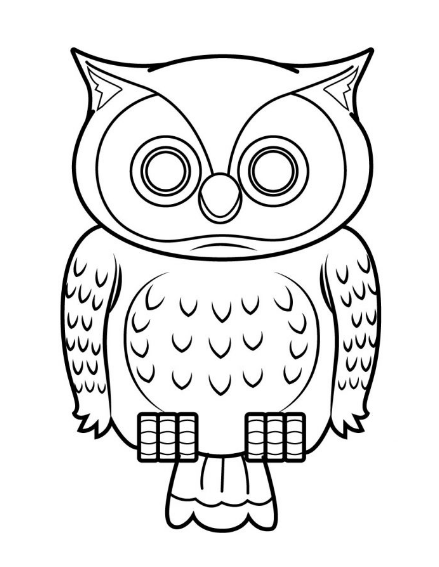
You can use curved lines on the body to create the look of feathers on your owl and some lines on the tail.
Step 9
You have completed your owl drawing, but there is still one thing left! This step will be fun as you can express yourself with beautiful colors.

We have shown one way of coloring with our picture, but for this step, you should let your creativity run free!
Choosing your favorite colors is one way to personalize your drawing, but feel free to experiment with art mediums such as acrylic paints, watercolors, crayons, or pencils.
The possibilities are endless, and I’m sure it will be amazing when it’s done!
Your Owl Drawing is Finished!